How to hide yourself in a light painting photo shoot [updated]
How to make yourself invisible in a photo without editing with Photoshop?
If you're as passionate about light-painting photography and visual arts as I am, then you'll love being a part of our incredible community. Join me in exploring uncharted territories of creativity and subscribe to my newsletter for exclusive updates and insights. Let's learn and grow together, and make art that truly inspires!
Hiding behind the subject, or even if there is no subject, is one of the main difficulties of light painting photography. This is an "error" forgivable in my opinion, since it is often almost impossible to hide completely or the shot came so well (the pose, the drawing, the composition) that ... who cares, we publish the photo equally :)
To perfect the art of light painting, one must be mindful not to allow their presence to appear in photos taken. This can sometimes be a tricky task due its complexity; but if done right and you manage to hide yourself behind the subject (or even with no subject at all), mastery over this type artwork will follow suit!
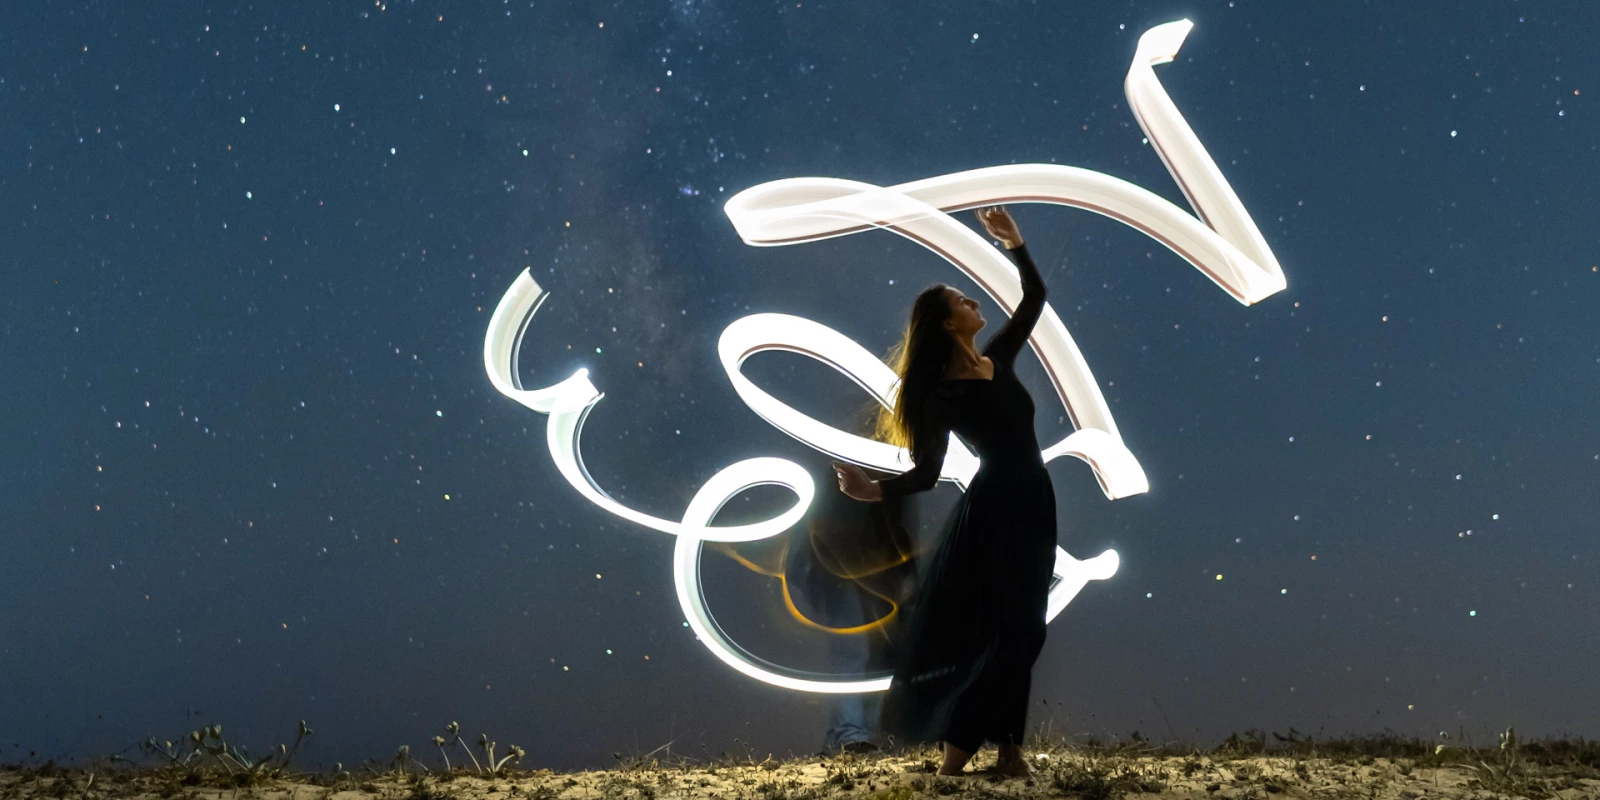
As seen in my cover photo for example: I wasn't quite able to disappear completely into Ilenia's pose during shooting, however still captured an incredible image. "Achieving invisibility" is much easier when it comes simpler shapes such as circles versus complex ones – proving that practice makes perfect!
The light painter must be invisible!
When creating light paintings using tubes, oftentimes the photographer will make certain mistakes that can "ruin" the result. Commonly, my feet and even legs become visible in photos with long exposures or I'll only partially be seen as a "divine apparition." Unless it is something easily concealed during post-processing, any movement present increases the risk of ruining the image - leading me to redo shots where these errors are more evident.
The most common mistakes when creating a light painting photo with light tubes are:
- the feet are clearly visible (ouch!) in photos
- maybe only the feet could be seen, also the ankles and partially the legs
- maybe only the legs, you can also see the rear in the photo
- you can see the face, even if with the light beam it becomes a sort of "divine apparition" in light painting
- you can see the legs moving (with very large light painting)
Usually when I run into these errors, if obvious and evident enough, we proceed to redo the shot.
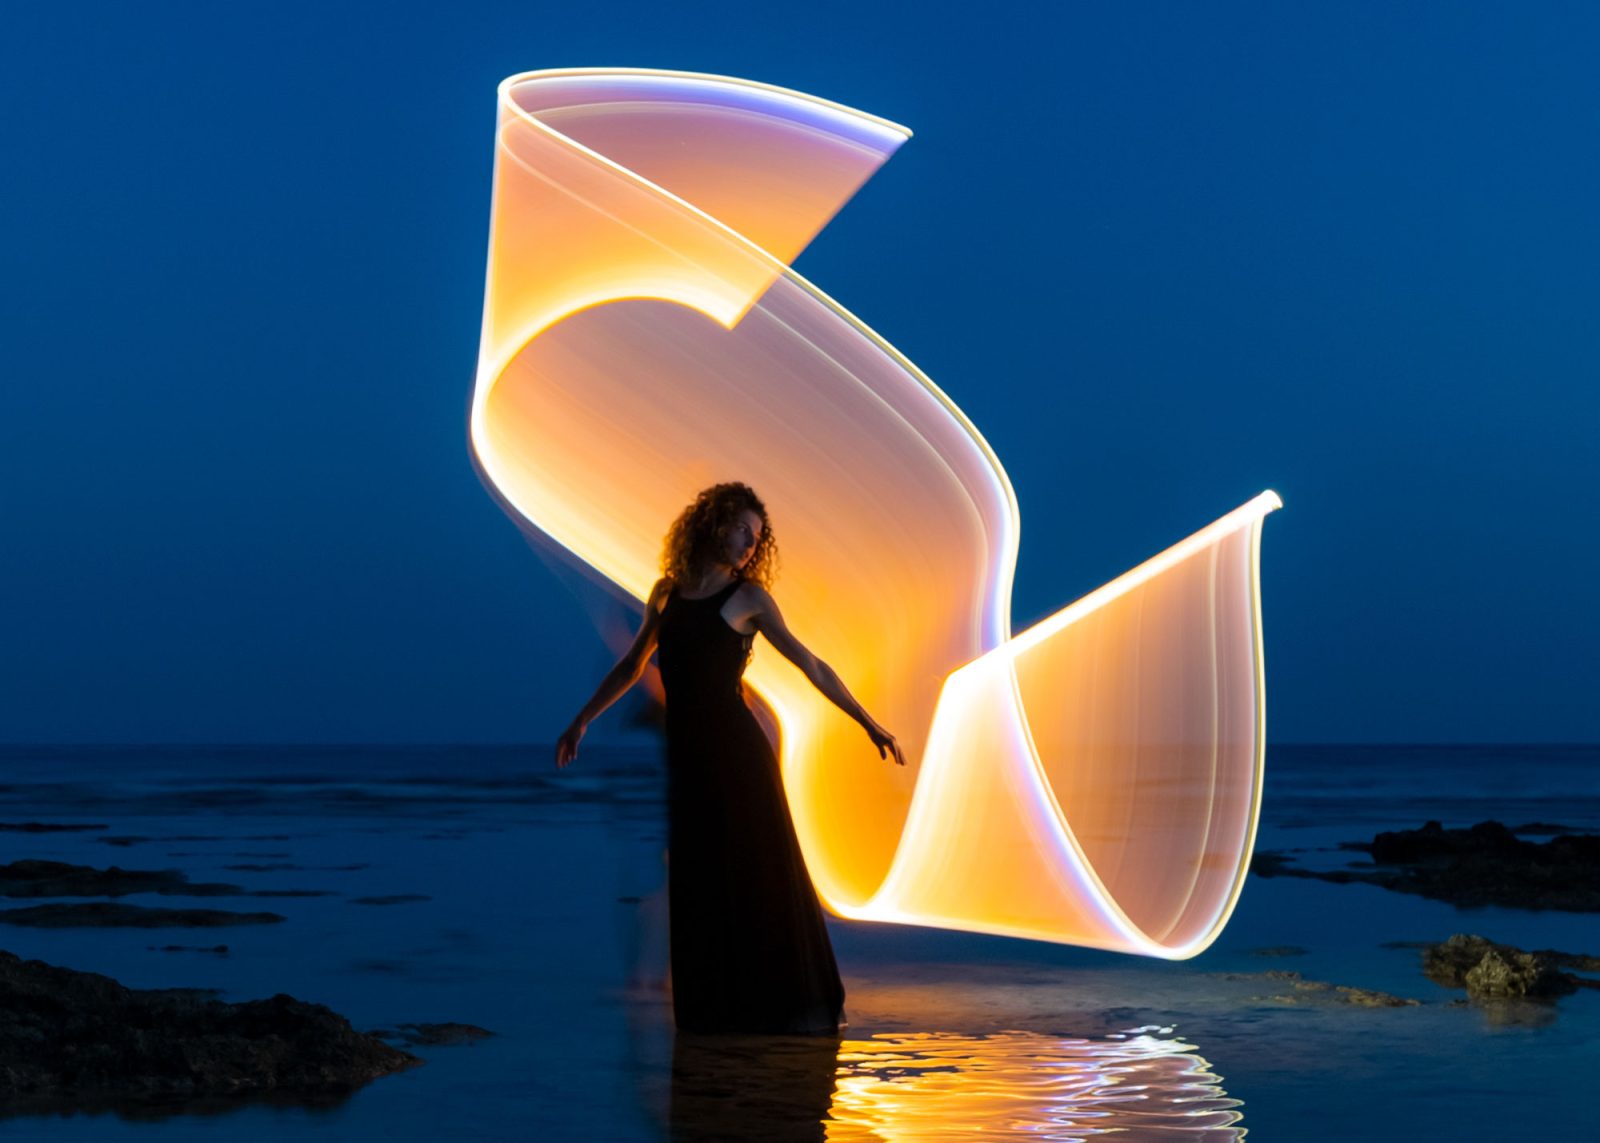
It may seem obvious but the risk of "appearing" in the photo is proportional to the movement, the complexity of the light painting design, the risk that the light bounces on some surface in a "wrong" way. If you make a circle, for example, the risk is greatly reduced even if it is not as simple as it seems.
Light Painting: how to avoid some mistakes
As a light-painter, I know how important it is to wear dark clothing. Black prevents any of the light from reflecting off our clothes and skin, while a hood or hat can be especially effective in eliminating additional glare. To ensure that none of my feet are exposed when posing for shots, I like to hide them behind rocks or sand piles – anything that adds some creative dimension while avoiding distraction!
My advice is to also have your models wear long dresses; not only does this slim their figure for better compositions but can also help conceal parts of you that could be distracting as well!
I must move quickly. Two seconds of exposure can be enough to overexpose my legs if I stay still for too many fractions of a second. Fortunately, using black adhesive tape on the side of the tube facing me helps reduce 'useless' light and keeps my photos looking great - even when dealing with reduced brightness levels! It's also worthwhile avoiding direct sources such as lighthouses, light spots, sorveillance LEDs or even the full moon which could unwittingly illuminate an ill-prepared subject without any mercy.
Recap mistakes in light-painting:
- Wearing black clothes helps a lot because it prevents light from bouncing off clothes (or on the skin of the light painter). Even a hat or hoodie can help a lot.
- Hide your feet behind something
- Get your model to wear a long dress (if possible)
- Move quickly
- Applying black adhesive tape on the side of the light tube
- Avoid direct light sources

Removing the light-painter from a photo, if visible
How I remove myself with Photoshop
Light painting is all about capturing the moment. However, sometimes I like to take it one step further by removing elements that are visible in my photos -- such as bits of me! To accomplish this with precision and accuracy, The Clone Stamp tool on Adobe Photoshop has been a faithful companion for many years. But now there's an even easier way: AI-driven Content Aware Fill can help you effortlessly delete any distracting details from your shots without compromising time or quality while retaining the true beauty of light painting photography. It takes some practice when dealing with layers and masks but mastering these tools will be worth every effort spent!
Appendix: My photographic equipment for Light-Painting
When light-painting, quality equipment can make all the difference in achieving stunning results. I use a Sony A7III camera with a set of Samyang prime lenses for my light-painting shots, mounted on an incredibly light and rigid tripod crafted from carbon fiber by Beschoi.
My toolkit is rounded out by a 1800 lumen LED flashlight which I use for light-painting tubes and other light sources for my Sublument light-painting project. With this setup, I'm able to capture light trails and light forms in vibrant color and clarity, creating something unique and incomparable in quality.
Questions? Want to learn light-painting?
If you have any questions related to light-painting, I'm more than happy to help. In the light-painting community, it's important to have a good support network engaged in helping each other and sharing information.
My light-painting project Sublument is helping light-painters learn just that - perfect their light-painting art and creative techniques with light-painting tubes.
If you're looking for more ways to get involved and explore light-painting, feel free to contact me or follow the Sublument light-painting project for updates and resources.