5 Different Camera settings from sunset to nighttime in light-painting photography
If you are a photographer and want to learn how to paint with light, this post is for you! You will learn about the different camera settings that can be used during sunset and at night to get the best results. This information is essential for anyone interested in taking amazing photographs with light. Read on to learn more!
When taking light painting photos, the camera settings change according to the time of day
Taking light painting photos can be a creatively rewarding experience, with the benefit of no two being alike. Of course, to get the best results, it's important to change your camera settings according to the season and time of day. Choosing the right combination of ISO, shutter speed, and aperture for daylight conditions ensures that your images have a high-quality resolution, sharp detail, and most importantly, that they capture your unique design. With a little practice and patience, you'll find that it's possible to create an original work of art with light painting photography.
For sunset photos, use a low aperture and high ISO to capture the bright colors
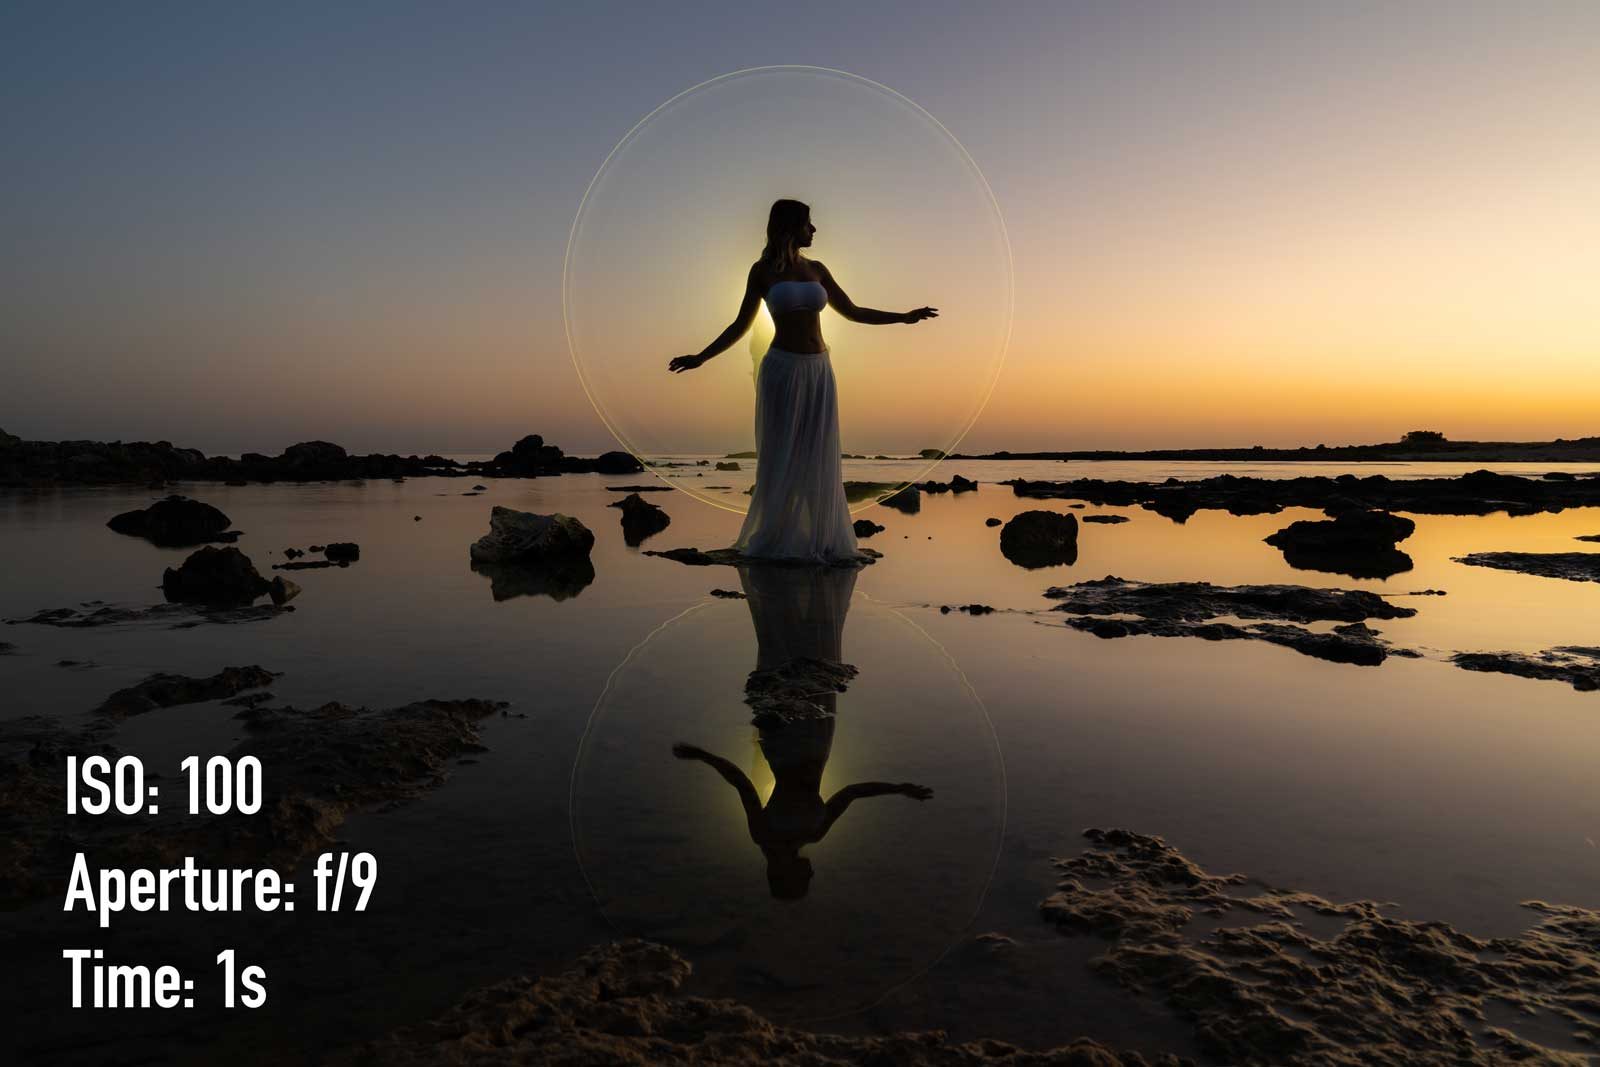
Have you ever wanted to capture the sparkle of a golden sunset with your camera? A key tip for perfecting such an image is to use a low aperture, which allows less light to reach the camera sensor and ensures that all parts of the frame are in focus. Also, you need to raise your ISO settings, as sunsets are usually less visible than daytime scenes. This combination will produce vivid coloring and sharp detail that will make sunset photos truly outstanding!
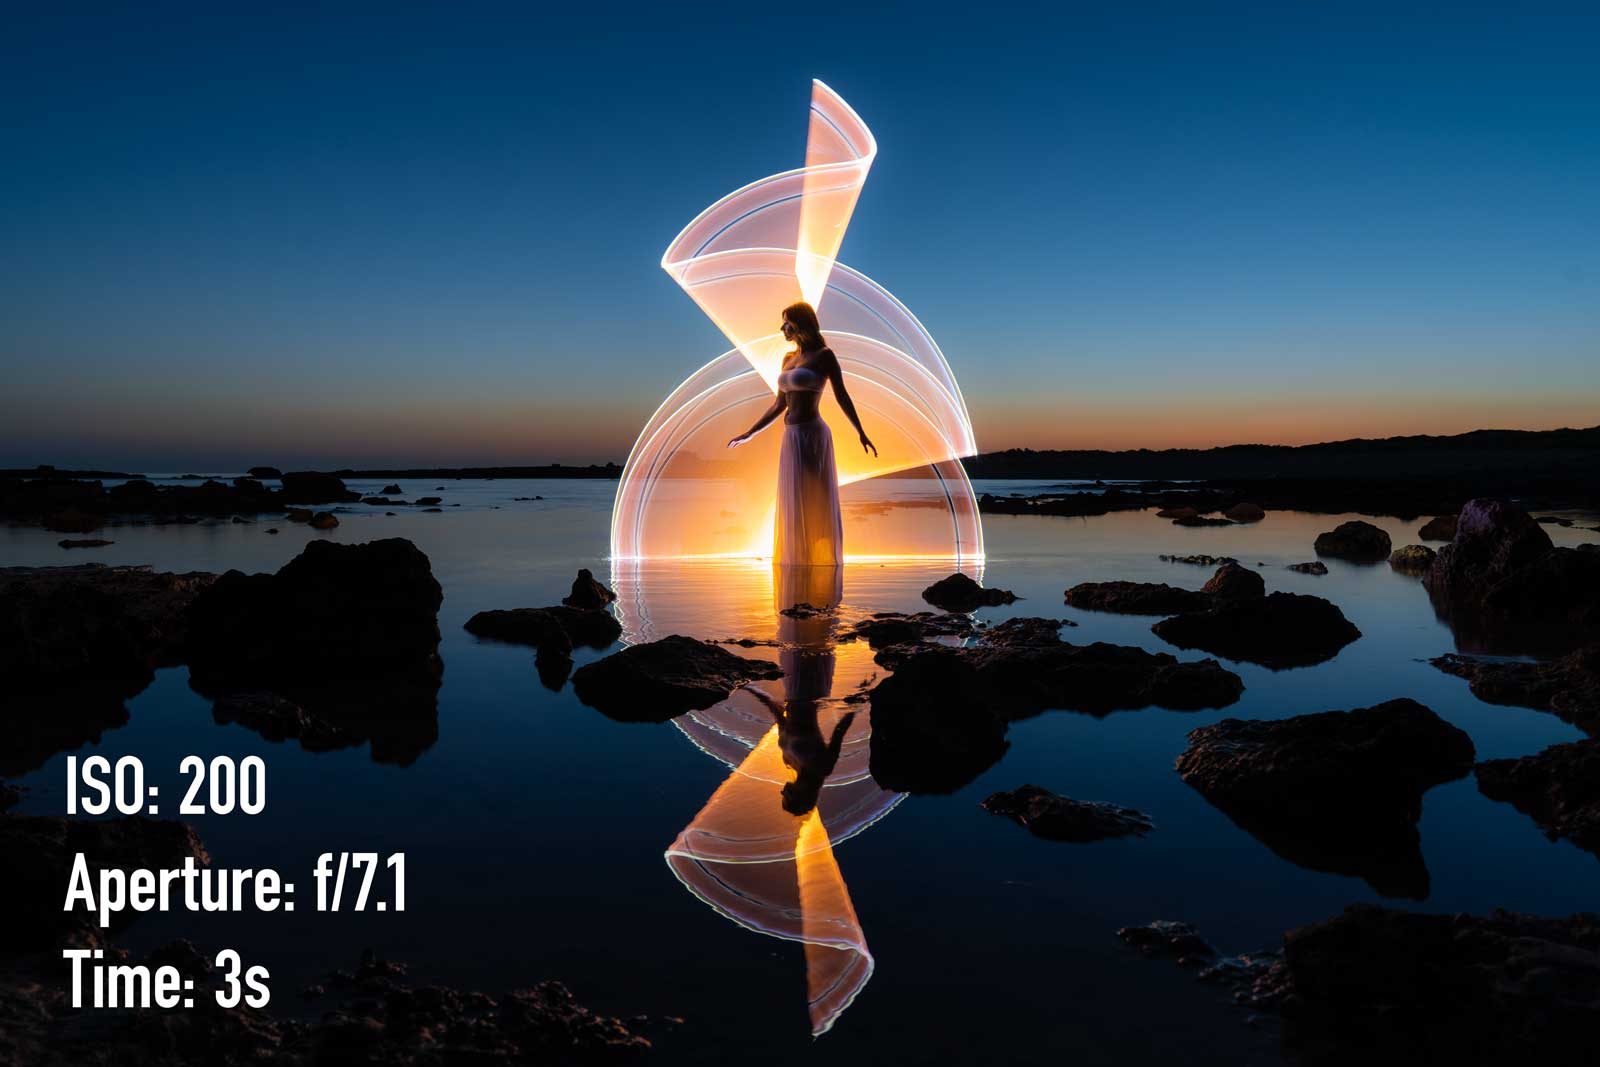
As the sun sets, my camera settings are carefully adjusted for light-painting. By setting a minimum ISO of 200, I can ensure that any tube used will be fully illuminated when captured in the photo. With an optimal aperture combined with a short exposure time, everything is balanced to create perfect images regardless of ambient lighting levels.
Look at the difference between ISO 100 and ISO 200:
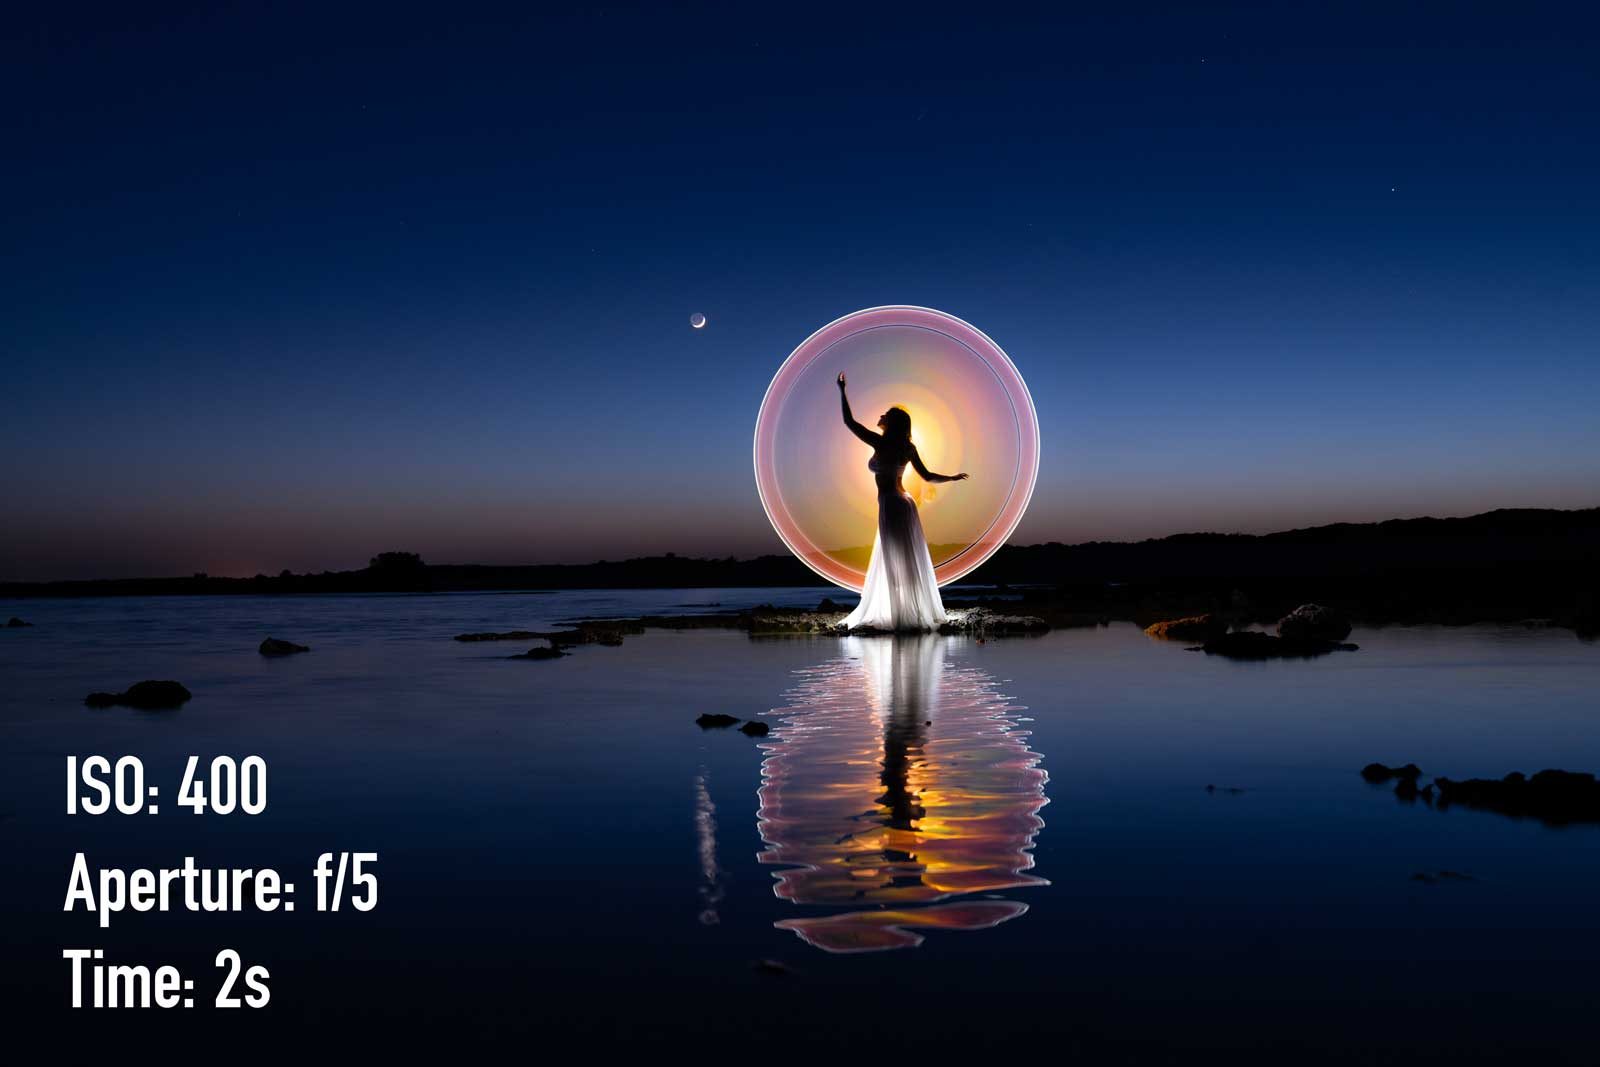
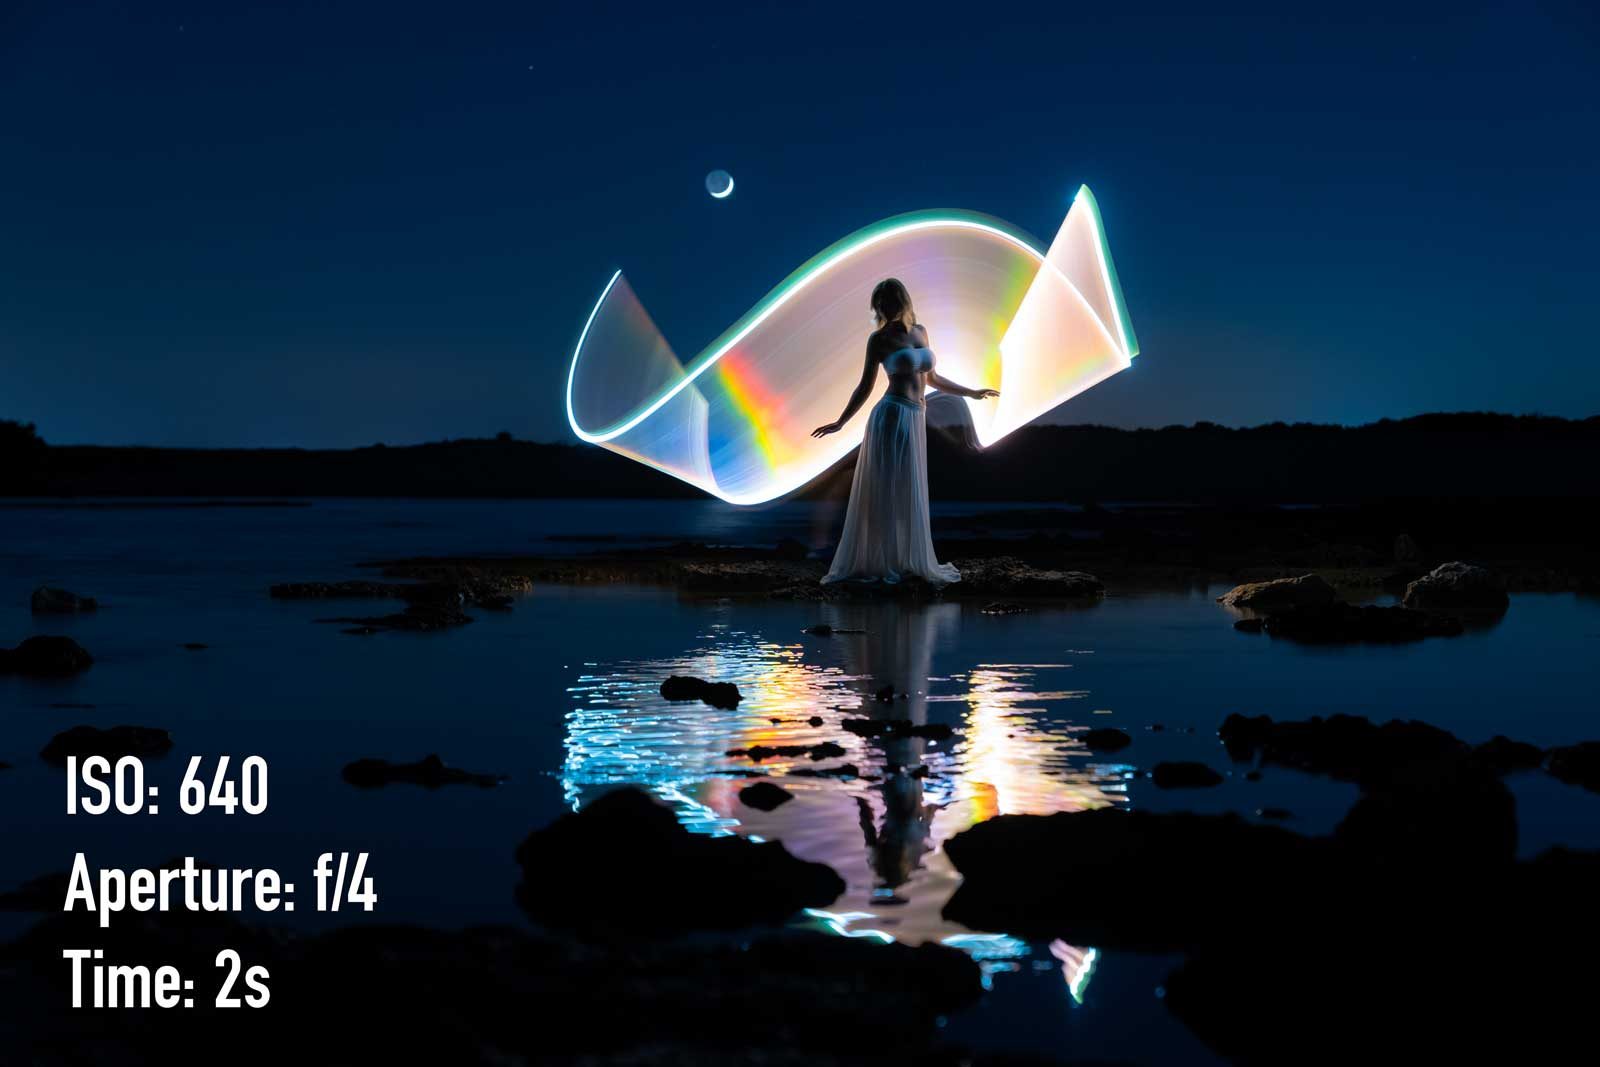
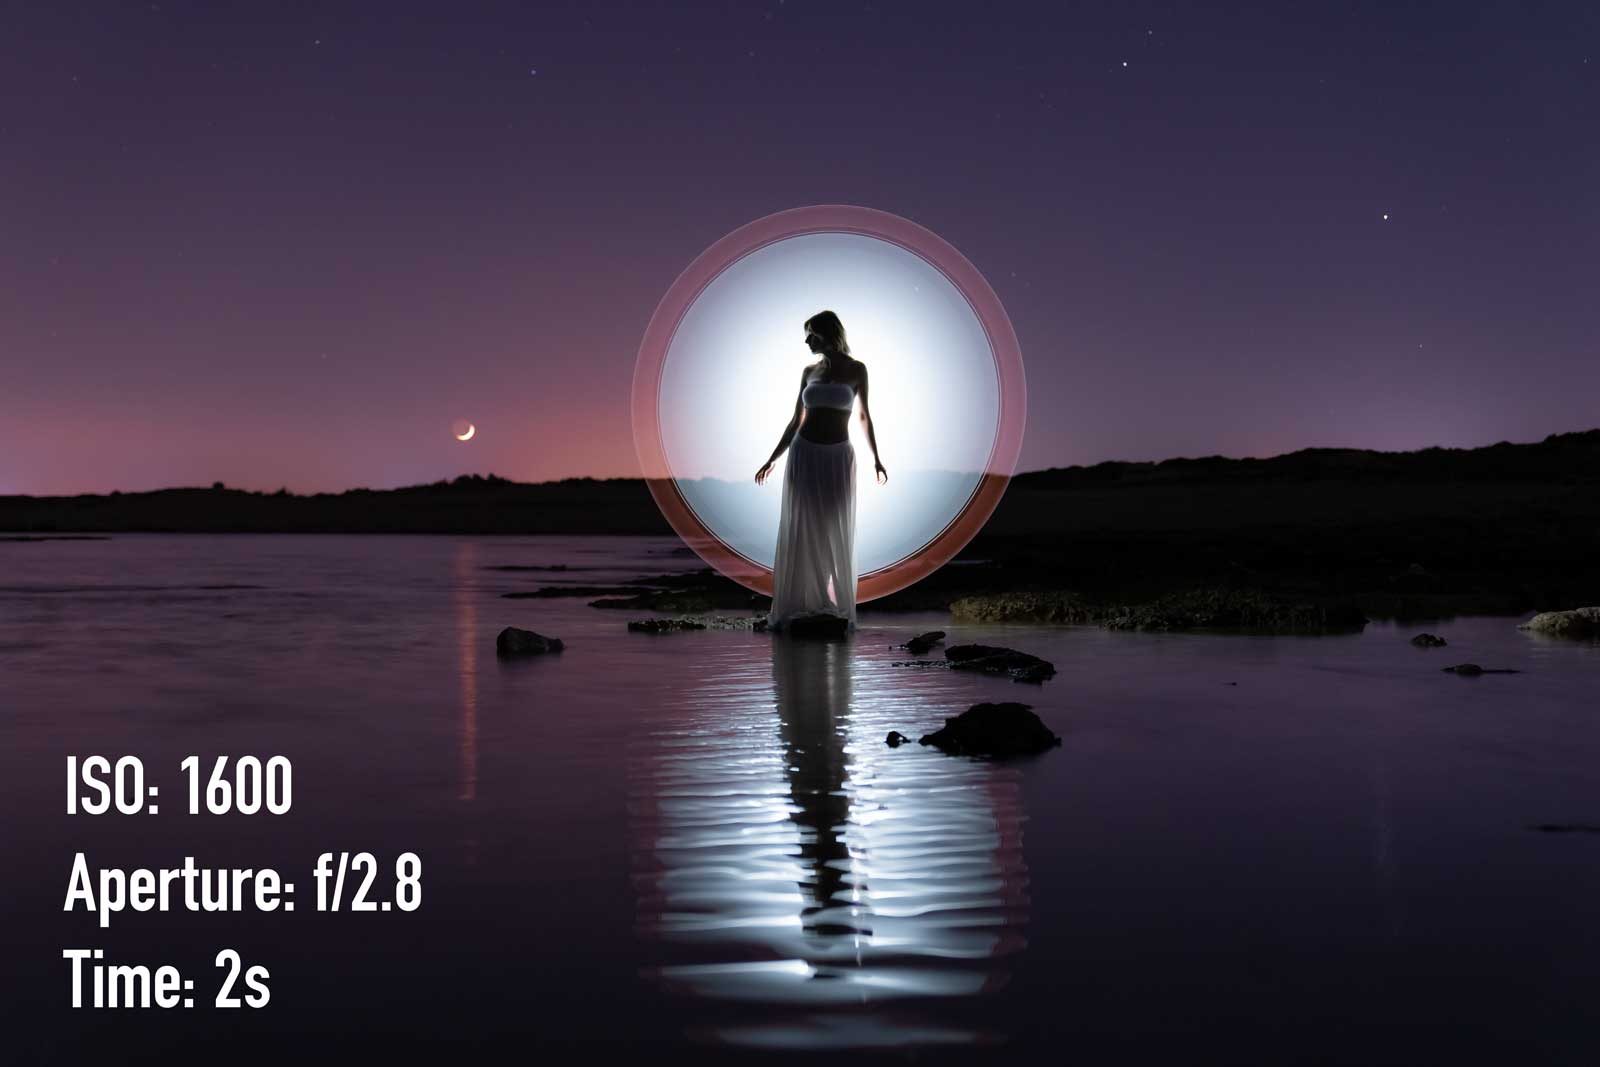
When it gets dark, increase the aperture and the ISO to get shapes filled with light
Taking great night photography can be a wonderful challenge and a rewarding experience. It can be difficult to get the perfect low-light shot without the image coming out blurry or noisy, but tweaking your camera settings to increase the aperture and decrease the ISO can help you capture stunning images. Aperture controls the amount of light entering the camera sensor, while ISO affects the sensitivity of the light entering. Balancing these two settings will result in the best quality photos! With a little practice and experimentation, night photography can open up a whole new world of creativity and opportunity.
Use a tripod to keep the camera steady during long exposures
Yes, it's obvious but using a tripod to stabilize the camera during long exposures is essential to avoid blur and get the sharpest images possible. A tripod can provide peace of mind, as it keeps the camera relatively still while you adjust settings or wait for the perfect shot. Even if your hands are steady and you think you don't need a tripod, using a tripod will ensure that the camera stays in place without experiencing imperceptible movements, movements that could be the difference between an ok photo and a great one.
Investing in a quality tripod can ensure that your photos come out clear and sharp, with no unnecessary blurred lines or softness from camera shake. Plus, it takes the guesswork out of stabilizing long exposures, so you can shoot right away!
Experiment with different shutter speeds and settings to create different effects
I usually need from 2 to 5 seconds and my camera is set to BULB mode. Sometimes I try to have longer exposures (i.e. to get a brighter Milky Way in the background). Experimenting with different shutter speeds is a great way to get creative and challenge your photography skills.
Experimenting with different speeds will help you understand how the camera captures time and light differently, and will also give you more control over the overall look of an image. If you are new to photography, challenging yourself by experimenting with different shutter speeds will help you gain confidence in your work and develop skills that will make all the difference when it comes to taking captivating photos.
Recap:
- Photo 1: ISO 100 - f/9 - 1 second (right after sunset, much light in ste sky)
- Photo 2: ISO 200 - f/7.1 - 3 seconds (20 minutes later)
- Photo 3: ISO 400 - f/5 - 2 seconds (40 minutes later)
- Photo 4: ISO 640 - f/4 - 2 seconds (1 hour later, no more blue hour)
- Photo 5: ISO 1600 - f/2.8 - 2 seconds (it was very dark, basically no moon)
Watch my demo video on YouTube
You can watch the full making-of of this video on Sublument's YouTube Channel. There's also a Short available.
All this creation and editing process was shown during a live streaming on YouTube. Soon I'll publish a shorter version of it so please subscribe! Sublument's YouTube Channel
Have fun and be creative with your light-painting photography!
Light-painting photography is a fun and creative way to explore the incredible potential of captured light! With a few simple tools, like a light source and a camera, you can create incredible images that will delight and inspire you and your viewers. It's easy to set up and play around with various techniques until you find something that appeals to you. There's no need to stick to a precise formula or plan when it comes to light painting; be inventive and let your curiosity guide you. Creativity in the use of light opens up limitless possibilities for unique expressions with your art!
I hope you enjoyed this quick guide on how to take light painting photos in 5 different times of the day/night. If you have any questions or want to share your tips and tricks, please let me know. I'd love to hear from you! And if you want to know more about light-painting photography, check out my other blog posts. Thanks for reading!