How to hide yourself in a light painting photo shoot
A note before we begin: This article was written years ago, but the fundamental principles of light painting remain as valid today as they were then. While some gear mentioned may be older models, the techniques and methodology have stood the test of time. I've updated it with fresh insights to help both beginners and experienced practitioners perfect their craft.
Table of Contents
- The Core Challenge
- Common Mistakes When Light Painting
- Techniques to Stay Invisible
- Fixing Mistakes in Post-Processing
- My Light Painting Gear
- Getting Started & Next Steps
The Core Challenge
Hiding yourself during a light painting shoot is one of the main challenges of this photographic discipline, and frankly it's something I still work on perfecting. The irony is beautiful: you're fighting to become invisible while creating visible art.
Staying hidden behind your subject (or when there's no subject at all) seems simple in theory but proves remarkably complex in practice. I consider an accidental appearance in the photo a forgivable error, especially when the composition, the light work, or the subject's pose comes out so well that you decide to publish it anyway. Sometimes those "mistakes" become the most memorable shots.
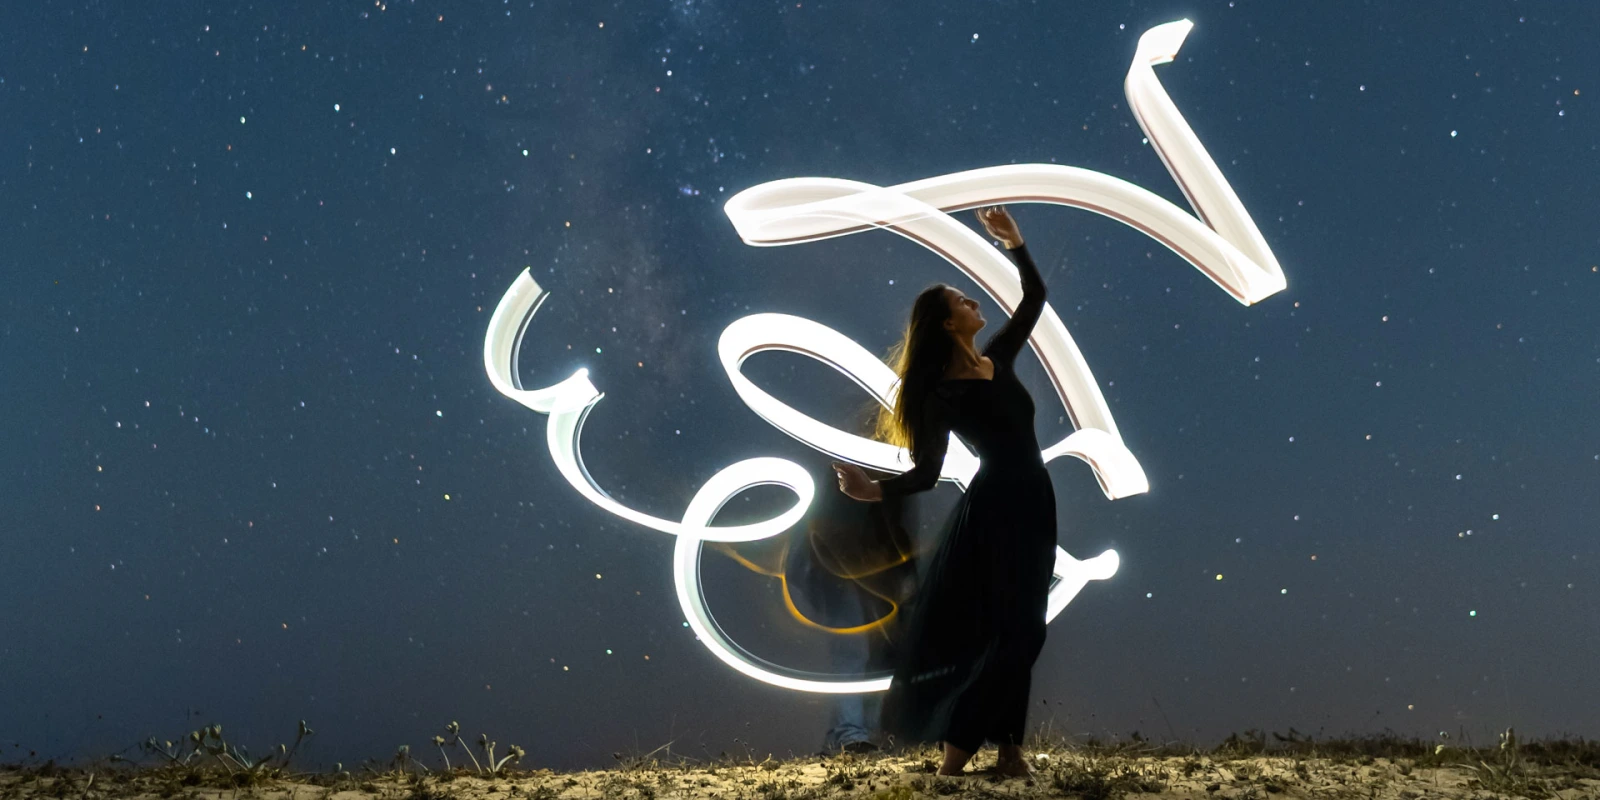
Look at my cover photo for example. I wasn't quite able to disappear completely behind Ilenia's figure during the shoot, yet we captured an incredible image. The lesson here is important for beginners: achieving invisibility is significantly easier with simple geometric shapes like circles compared to complex poses or complex scenes. With experience comes the mastery that makes staying hidden almost second nature.
Common Mistakes When Light Painting
When working with light tubes and long exposure times, photographers commonly make errors that can compromise the entire shot. I've made every single one myself. The most typical visibility issues are:
- Feet clearly visible in the frame (the most common offender)
- Feet, ankles, and partial legs showing in the shot
- Full leg visibility, sometimes including the rear
- Face appearing as a ghostly "divine apparition" in the light beam
- Leg movement visible during the light painting sequence
The visibility risk is proportional to three factors: your movement during exposure, the complexity of your light design, and the chance that light bounces off surfaces unexpectedly. A simple circle carries far less risk than a complex figure or landscape painting, though even circles require precision.
Usually when I encounter these errors, if they're obvious enough, we simply redo the shot. I'd rather spend an extra few minutes on set than spend hours in post-processing trying to fix a visible arm or leg.
Techniques to Stay Invisible
Wear Dark Clothing
This is non-negotiable. Black clothing prevents light from reflecting off your outfit and skin, significantly reducing accidental visibility. A hood or hat works especially well for eliminating additional glare. I always shoot in black, and I recommend models do the same. It's not just practical; it's also easier on the eyes during the long exposure.
Hide Your Feet Strategically
Your feet are your first visibility problem. Hide them behind rocks, sand piles, or any natural feature that adds dimension to your composition. Position yourself deliberately, using the terrain as a shield. This simple precaution eliminates the most common error in light painting.
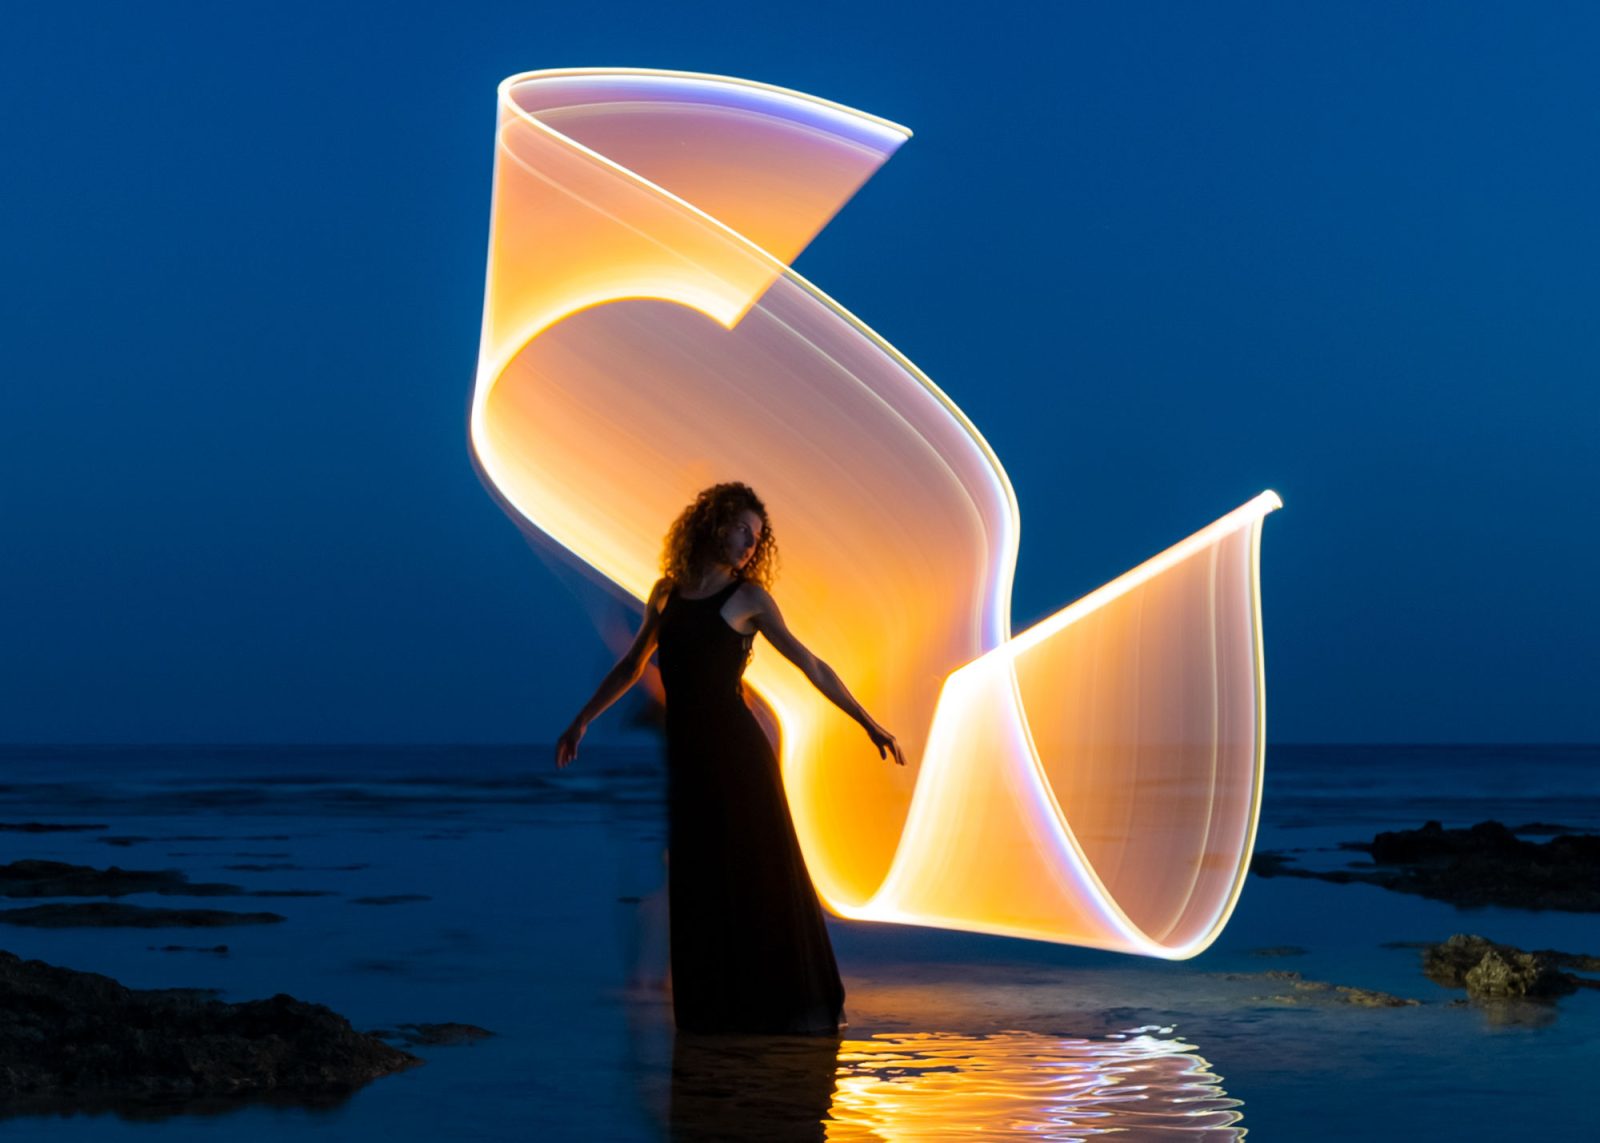
Position Model With Long Dress (When Possible)
Advising a model to wear a long dress solves multiple problems at once. It conceals your body position behind theirs, creates better proportions in the composition, and gives you more room to hide. It's not just for aesthetics; it's a practical tool for staying invisible.
Move Quickly
This is crucial for minimizing exposure time on your body. In a two-second exposure, you need to be as smooth and swift as a dancer. Stay completely still for even a fraction of a second too long, and your legs will glow in the frame. I think of myself as a shadow, moving with purpose but leaving no trace.
Use Black Adhesive Tape
Black tape applied to the side of your light tube facing you reduces unnecessary light pollution significantly. Yes, it can reduce overall illumination slightly, but the trade-off is worth it. You'll have more control and less accidental spill lighting your body.
Avoid Direct Light Sources
Don't shoot near direct light sources: distant lighthouses, LED street lights, surveillance cameras, or even a full moon can illuminate you mercilessly. Scout your location beforehand and plan your positioning accordingly.
Quick Reference Checklist
- Wear black clothes to prevent light reflection
- Hide your feet behind terrain or props
- Use long dresses on models when possible
- Move quickly and deliberately through your light painting sequence
- Apply black tape to reduce light tube spill
- Avoid shooting near direct light sources
- Use smartphone live-view to monitor your position in the frame
Fixing Mistakes in Post-Processing
Sometimes despite your best efforts, you end up in the photo. That's when post-processing enters the picture.
Adobe Photoshop's Clone Stamp tool has been my trusted companion for years when removing unwanted elements. It requires precision and practice, but it works. More recently, AI-driven Content Aware Fill has made this process faster and more forgiving. It can erase distracting details while maintaining the integrity of your light painting work.
That said, I believe the true spirit of light painting lies in capturing something "live" during the exposure, without needing to edit out mistakes. The goal should always be to get it right in-camera. Use editing as a backup, not as your primary strategy.
Learn more about light painting for beginners if you need foundational techniques.
My Light Painting Gear
Note: This is the gear I was using at the time of writing. While some may be older models now, they served me incredibly well and the same principles apply if you're shopping for similar equipment today.
Camera & Lenses
I use a Sony A7III camera paired with Samyang prime lenses for light painting work. The Sony's exceptional low-light performance and reliable autofocus make it ideal for this discipline. The 14mm Samyang prime gives me the wide focal length I need for capturing expansive light trails.
Support & Stability
A robust, lightweight tripod is non-negotiable for light painting. I use a carbon fiber Beschoi tripod, which provides the rigidity needed for sharp images while remaining light enough to carry through multiple shooting locations.
Light Sources
My main tool is a 1800 lumen LED flashlight designed specifically for light painting. I've reviewed my complete light painting tube setup here. Different tube colors and intensities give you creative flexibility, but stick with reliable, adjustable models that won't fail mid-sequence.
Getting Started & Next Steps
If you're new to light painting, start by mastering the basics of staying invisible before attempting complex compositions. Practice simple circles first. Work with models who understand the technique. Be patient with yourself and iterations.
Have questions? Whether you're struggling with visibility, gear selection, or technique refinement, I'm here to help. The light painting community thrives on shared knowledge and mutual support.
Get in touch with me directly if you want personalized guidance for your light painting project. Or subscribe to my newsletter for ongoing tips, new techniques, and community updates.
Ready to explore more? Visit the Sublument light painting project for additional resources, galleries, and a growing community of light painters pushing creative boundaries.
Subscribe to the Sublument Newsletter for exclusive light painting insights
Let's create something extraordinary together.
— Andrea